With 2 crews now completed, I finally got to try learning to play the game yesterday. What follows is the first part of a detailed battle report. As I had mentioned in another post, Malifaux is a completely diceless system where each side uses a fate deck of cards (4 suits of with values of 1-13 and two jokers. Malifaux uses its own suits but you can substitute regular playing cards if you don’t have the actual Malifaux fate deck). In this report I’ll try to convey as much of the mechanics as I can into my narrative without getting overly bogged down, so anyone interested in hearing how the system plays can get a feel for it.
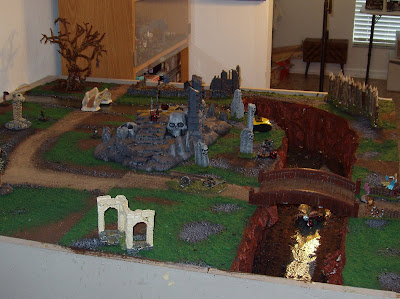
Since it’s been 6 months since I’ve built my table and terrain boards and I still haven’t gotten to use them yet, I was really excited to get to move some models around the chasm boards. I set it up with some simple terrain pieces to provide some cover.

Ophelia’s starting box crew contains 22 soulstones worth of models, while Seamus’s includes 18, so I play a 22 pt game where Seamus has a soulstone pool of 4. This is pretty much in the range of a standard game, which seems to be 25 pts.
Seamus’s crew consists of Seamus, three Rotting Belles, and Madame Sybille. He is basically the zombie master surrounded by his minions.
Ophelia’s crew consists of Ophelia, Francois, Raphael, Rami, and Pere Ravage. Everyone in her crew is packing heat, and each member has different abilities, unlike Seamus’ crew where the three belles each have the same stats.
I was playing against myself, so throughout the report when you see ‘Seamus did this’ or ‘Ophelia did that’ you’ll know it was just me using either the Seamus side of my brain or the Ophelia side.
I don’t draw a random location since I’ve already set up my chasm boards. Looking through the different locales in the chart, “Mountains” seems to fit the best. Looking over the board, I work out that the River is Severe Terrain (movement costs twice as much) and a water feature. The chasm itself is impassable terrain. I decide that all cover is considered to be hard cover, and that none of the terrain is breakable.

The deployment zones are randomly determined (by card flip) to be 8” on opposite ends of the table.
Now it is time to determine Strategems for each crew. The stratagem is that crew’s objective for the game. Seamus draws Reconnoiter, which means he has to have a member of his crew in each table quarter at the games end to get the 3 victory points for this stratagem.
Ophelia draws Slaughter, which has two levels of success. If she eliminates all models but the enemy ‘master’ she will get 3 victory points, or 4 points for eliminating the entire crew.
And now the two crews get to pick up to two schemes each. Since I’m playing both sides, I’m considering that each side is ‘announcing’ their scheme, making each of the schemes worth an extra point. Seamus picks Army of the Dead, one specific to the Resurrectionists faction. For 2 victory points, Seamus has to control more undead models and corpse counters at the end of the game than his opponent has models left on the table. For a second scheme he chooses Breakthrough for 2 victory points, since it goes well with his Reconnoiter Strategem (with Breakthrough you must have more models than your opponent in your opponent’s deployment zone at the end of the game.
Ophelia takes the Thwart scheme, which is exclusive to the Outcast faction. She will get 2 victory points if her opponent fails to complete their Strategem. For the second scheme, she takes Stake a Claim, choosing the Skull Temple at the center of the table (since the terrain feature is supposed to be 3”x3”, she specifies the chaos emblem on the raised level of the terrain piece to be her objective. She must have sole control of this 3”x3” area at the end of the game to get 2 victory points.
Now it is time to duel for deployment. Ophelia draws a 13, beating Seamus’ 9. Since she has the ranged firepower, and since most of Seamus’ goals revolve around getting models to certain parts of the table, she decides to make Seamus choose a table side and deploy his forces first, then deploy her forces in a way to best stop him from completing his goals.

Seamus picks the side without the river, since that would slow his minions down at the beginning of the day, and being zombies, they are already slow to begin with. He deploys 2 belles on the southern end of the board on the other side of the chasm, intending to move them straight across to gain control of the southeast quarter and hopefully manage to get at least one in Ophelia’s deployment zone by the end of the game. He deploys the third Belle in the northwest corner, planning on moving her straight across to control the northeast corner and also hopefully get into Ophelia’s deployment zone. Seamus himself and Sybille are deployed in the center. Since Seamus is the heavy hitter of the crew, his combat prowess will be needed to tie up the opposition and draw fire from the belles trying to meet his objectives and also to hopefully keep Ophelia from controlling the temple ruins and completing her Stake a Claim scheme. He keeps Sybille with him as a back up, but plans on keeping her close to the chasm edge, for she has an ability which allows her to summon a belle within 12” into base contact with her, so she could quickly pull one of them from the other side of the chasm if need be.

Ophelia decides to deploy Raphael on the opposite side of the chasm to stop the two Belles. She deploys Rami just on the northern side, so that he can back up Raphael by picking the belles off across the chasm with his long rifle’s 16” range, while still being able to contribute to what will probably be the main fight at the center of the table near the skull temple. Meanwhile, she deploys herself, Francois, and Pere Ravage just to the east of the bridge on the northern side of the table, planning on making a bee line for the temple, with someone peeling off to deal with the Belle if she tries coming across the northern end of the board.
Well the setup had been done, the plans had been made, the forces had been deployed, and now it was time to get started, so I put some mood music in the CD changer (from my collection of Nox Arcana albums) and started the game.
TURN ONEBoth players draw cards to determine the order for resolving effects in the Start of Draw Phase and End of Turn phases. Ophelia wins the duel so her effects are resolved first. In this game, there were never any effects needing to be resolved, so the only effect it had was that she discarded cards and filled her hand up to full first in the draw phases.
Now both players draw their starting hands, which for a game of this size, was six cards.
Ophelia draws a 9 of masks, 12 of crows, 5 of tomes, ace of crows, ace of rams, and a 2 of masks.

Seamus draws an ace of tomes, ace of crows, 2 of masks, 5 of crows, red joker (which is the good one), and an 11 of masks.

The two players duel for initiative, with Ophelia winning and going first.

Now the activations start. Since no abilities were used and no actions taken other than movement, I’ll just summarize by saying that both sides moved everyone forward according to what their plans had been when deploying. Looking back through the book now, I just spotted that normal games are generally played on a 3’x3’ with Brawls (games 2 or 3 times larger) played on a 4’x4’, so I probably should have used less of my table and there would have been more going on in the first turn. I know for next time at least.
TURN TWO
The draw phase was short, as since no cards from either players control hand were used turn one, both players just kept their starting hands, and the two cards in the discard piles were shuffled back into the decks.
This time Seamus wins the initiative and so goes first.
One of the things in Malifaux that is different from most other mini games out there right now is that players alternate activating models. (there are some rules that allow certain models to activate simultaneously if the player wishes) The effects of this aren’t seen quite as much in the second turn, as for the most part, the models were just moving into the positions they were already heading.
The easternmost of the two Rotting Belles across chasm activates first. Units in Malifaux get two actions per turn, and she uses her first action to advance her movement of 4”, using two of it to climb over the fence and moving up 2” beyond it. With her second action she moves again, advancing another 4”.

Ophelia responds by moving Rami into firing position on the northern side of the chasm.
Seamus then moves Sybille in towards Rami, hiding behind one of the skull rocks to keep out of his line of sight.
Pere Ravage moves up to the eastern edge of the skull temple.
The Belle in the north continues making her way across the board.
Ophelia moves westward along the road, placing herself directly in between the skull temple and the northern Belle.
Seamus moves into the skull temple, finding some cover in the southwest corner of the terrain piece.
Francois moves up to the northern edge of the skull temple, out of Seamus’ line of sight.
Things start to get interesting with the final two activations of the round.
The second Belle in the south activates, using her first action to cast Distract on Raphael (being dead doesn’t stop these ladies of the night from strutting their stuff). The ability has a 15” range and she has it. Seamus draws a five, adding the Belle’s Casting stat of 4 to make a total of 9. Ophelia draws a six, and adds the Raphael’s Willpower of 4 for a total of 10 to resist the effect. Right now, Seamus is losing the duel and so has the opportunity to cheat fate, which he does by using the 11 of masks to replace the fate card he flipped from the deck and make his new total a 15, which meets the casting cost of 12 and beats Ophelia’s resistance total of 10. Now Ophelia has the option to cheat fate, but she opts not to waste the one 11+ card she currently has in her hand, and the Distract ability is successfully cast, making Raphael Slow (only 1 action instead of 2) during his next activation. For her second action, the Belle casts Lure on Raphael. Since the range on that is 18” she definitely has it. The Rotting Belles receive a +4 to their Casting stat when using Lure (those zombie hookers know how to shake it) and so will get a +8 to the card flip, which turns out to be an eight giving Seamus a total of 16. Ophelia draws a seven and adds Raph’s Willpower to get a total of 11. Since she is currently losing the duel she gets the first option to cheat fate but opts not to, so the spell goes off and Raphael is moved 4” closer to the Rotting Belle.
Raphael activates, and only gets one action this turn since he is Slow from the Distract spell. He uses that action to take a shot at the closes Belle with his range 8” Big Honkin Gun, but ends up being a half inch short, so misses.

No effects need be resolved in the closing phase, so that’s the end of TURN TWO.
THIRD TURN
At the beginning of the draw phase, Ophelia discards two aces and a two from her hand and picks up a thirteen of crows, a two of rams, and a four of rams.
Seamus then discards two aces, a two and a five, keeping only the Red Joker, and draws a five of crows, nine of masks, twelve of rams, thirteen of masks, and thirteen of crows (a very good draw!)
Ophelia wins the duel for initiative and activates Raphael.
Raph fires at the moves up just enough to be in range of the Belle he missed previously and shoots his Big Honkin Gun at her. Ophelia flips a seven and adds his Combat of 5 (for the Big Honkin Gun. Each of a model’s attack types has its own Combat stat assigned to it, so that a model may be better with one weapon than with another) to get a total of 12. Seamus flips a six and adds the Belle’s Defense of four to get a total of 10. The current loser gets the chance to cheat first, and Seamus does by throwing down his thirteen of masks to change his total to 17. Ophelia responds by cheating with her own total to 18 by using the thirteen of crows from her hand. Since each side only gets one opportunity to cheat, the duel is resolved, and Raphael scores a hit with his Big Honkin Gun. Damage 8/13/3. 2 damage to Belle
I’ll take an aside here to explain some of the mechanics, as we’ve come to another of the really interesting parts of this rules system. We’ve all had those moments where we roll a 6 to hit followed by a 1 to wound, or in D20 games roll 28 to hit but do 1 point of damage by flubbing the damage roll, in other words basically we really hit the enemy solidly in the middle of his chest, but only with enough force required to break a Q-tip. Or conversely, someone just grazes but inflicts maximum damage, apparently by causing the target’s brain to hemorrhage. In Malifaux, how well you hit someone directly affects how much damage you are likely to do.
Since Raphael’s attack total of 18 only beat the Belle’s defense total of 17 by one point, there is now a negative (-) one card on the damage flip. The Belle also has the ability Hard to Wound (1), meaning that the damage flip receives another negative card. This means that two extra cards (a total of 3) must be drawn now for the damage flip, and the lowest card must be used. Some things also give positive (+) cards to a flip, in which case extra cards are drawn and the highest card is used. Only a maximum of three extra cards can ever be drawn on a flip, and of course, negatives and positives cancel one another, just like in mathematics, so if you have two positive card effects and one negative card effect, you would end up drawing one extra card and using the highest.
So back to the game, Ophelia draws an eight, a thirteen, and a three for her damage flip, and so must use the three. You are allowed to cheat a damage flip, but only when a single card is flipped. It only works that way for damage. For any other flip, you can still cheat fate even if you flipped multiple cards. So Ophelia must use the three, which determines what damage she does.
And here we take another quick break for game mechanics. Each weapon or damaging effect in Malifaux has a set of three damage values, Weak, Moderate, and Severe. Which value is used depends on what the damage flip is. Ace through five is Weak, six to ten is Moderate, and eleven through thirteen is Severe. Each of the Malifaux fate cards has a Weak, Moderate, or Severe printed at the top just below the number, so it saves you from having to memorize the chart. Also, if a black joker is flipped the damage is always zero, and if a red is flipped the damage is severe plus you flip another card and add that to the total damage.
So back to the game, Ophelia has to use the three for the damage flip, which is Weak, and Raph’s Big Honkin Gun has a damage value of2/3/5, so the attack does 2 wounds to the Rotten Belle, leaving her with 6 left.

In response, Seamus activates the Belle that was further back, and successfully casts Lure on Raphael, successfully casts Lure, making Raph move 5” directly towards her (and consequently the other Belle in front of her). For her second action she successfully casts Distract on Raphael, making him Slow for his next activation.
Ophelia activates Rami and has him take a move action to get to where he has line of sight to Sybille behind the skull rock and uses his second action to take a shot at her. She is in hard cover, which gives a -1 card to the attack flip. Ophelia flips an eleven and a six, and so has to use the six, which added to Rami’s combat of 5 with his Long Rifle makes her attack total an 11. Seamus flips a three for a total defense of 7. Seamus cheats with the twelve from his hand, and Ophelia responds by using her own twelve, and the duel ends with Ophelia beating Seamus’ defense total by 1 point, giving her a -1 card to the damage flip. Sybille is Hard to Wound (1), so Ophelia must again draw 2 extra cards and use the lowest. Fortunately one of those cards was a red joker, and jokers must always be used whenever they are drawn. So Ophelia does Severe damage (which for Rami’s gun is 5) plus another card flip, which in this case was a disappointing two. The hard cover gives Sybille Armor (1) which means the damage taken is 1 point lower, so the attack does a total of 6 wounds (5+2-1=6) to Sybille bringing her down to 3 wounds. If Ophelia had been able to make more of that red joker, Rami would have dropped Sybille in that one shot.
Seamus activates the wounded Belle and casts Lure with a total of 17 which Ophelia would have needed to have a thirteen to beat, which she didn’t draw or have in her control hand to cheat fate with. So the spell goes off and makes Raphael again move his walk distance of 5” toward her, which now puts him into her melee range, allowing her to make an immediate attack. She can attack with her parasol, which has a 2” range, or with her nails that have a 1” range. Since she is in base to base, Seamus has her use her nails, as they have a higher chance to hit and better damage potential. Seamus flips a three for the melee attack for a total of 9, which doesn’t beat Ophelia’s total of 10. Seamus uses the five of crows to cheat (and the suit becomes important in a sec) and ends up beating Ophelia’s total by 1, giving him a damage flip of -1card.
Because the fate card used in the duel was a crows suit, Seamus gets the opportunity to activate one of the Belle’s Trigger Effects which may activates whenever a crows card is drawn when making an attack. (each trigger has its own requirements) In this case, the Trigger Effect is Rot, which adds a +2card to the damage flip. So with that and the -1card, Seamus will end up drawing one extra card and using the highest. In this case, the highest is a twelve, and the Belle does her Severe damage value of 4, dropping Raphael to 4 wounds.
For her second action (since the melee attack was an effect of the Lure spell it did not count as an action), the Belle makes another melee attack, and this time Seamus beats Ophelia’s defense total by more than 5, which does not carry a penalty to the damage flip, and thus frees him up to cheat the damage flip if he wishes. He decides to cheat with the red joker from his hand, which does the Belle’s Severe damage of 4 plus an extra card flip of 7, for a whopping total of 11 wounds – more than enough to kill poor Raphael. Raph dies and leaves a corpse counter behind.
Ophelia activates Pere Ravage, who climbs up onto the skull temple with his first action and attempts to Breathe Fire on Seamus with his second action. Seamus is partially behind a ruined column so is in hard cover, giving a -1card to the attack flip. Ophelia still ends up with a total of 12 to Seamus’ 8. Seamus declines to cheat fate, and Ophelia cheats a nine of masks, which raises her total to 14, beating the defense number by enough so as to not receive a –card to the flip. The masks suit also activates Pere Ravage’s Stupid Luck trigger. This causes any damage done to be tripled, after which Ravage is sacrificed. Since the Breathe Fire damage is 1/3/4, Ophelia reasoned that it would be worth sacrificing Ravage to potentially put Seamus at death’s door. Unfortunately, thanks to Seamus’ Hard to Wound (2) ability, she ended up with a three and thus did the attack’s Weak damage of 1, tripled to a whole 3 points. The Armor(1) given by the hard cover reduced it further to 2 wounds taken by Seamus, leaving him with ten more still and making it a very bad trade off in retrospect.
For the next activation, Seamus moves the Belle in the north further across the table.
Ophelia activates and uses her fist action to move 6” closer to the Belle. With her second she attempts to cast Right Between the Eyes on the Belle, which if successful, would do 1/3/5 damage with a +3card on the damage flip. Ophelia draws a twelve, adding it to her casting to give her a total of 16. Seamus draws a 12 and adds the Belle’s defense of 4 for a total of 16 to resist the spell’s effects (some spells require Defense to resist, others require Willpower) Unlike with a ranged attack where you only have to match the defense total, with a spell you actually have to beat the total, so right now Ophelia is losing the duel and doesn’t have a card in her hand high enough to beat it.
I want to pause here to say that this is what Soulstones are used for. You can cheat fate for spells as normal, replacing the card drawn with one from your hand, but by using a soulstone when casting a spell, you can actually ADD the value of a card from your hand to the value of the card drawn. This definitely would have been a great opportunity for Ophelia to use it. Unfortunately, I had totally screwed the pooch when setting up the game and shorted her the 6 Soulstones she was supposed to have. I’ll explain how I made the mistake later. It has to do with the fact that Ophelia is a Henchman rather than a Master (something introduced in the second book) Basically I badly misread the Henchman rules.
Anyway, Ophelia’s spell doesn’t go off and that’s the end of her activation.
Seamus activates and moves to where he can get a shot at Francois, who is up against the northern base of the skull temple. With his second action, he fires at him. Francois is getting hard cover from the lip of the terrain piece, and Seamus ends up missing him.
In return, Francois moves back with his first action, giving him a clear line of sight in which to shoot Seamus. He hits him, but only does his weak (2) damage, thanks again to Seamus’ Hard to Wound(2), and Seamus is brought down to 8 wounds.
Sybille does not have a clear charge lane to get to Rami, so she uses a move action to get within the 2” range of her Riding Crop and lets him have it with her second action. Seamus flips a twelve and Ophelia flips a one. She has nothing in her hand to beat Seamus’ total with, but cheats with a two just to avoid Seamus getting a +1card to the damage flip. Seamus ends up flipping a five and doing 2 damage to Rami.
Want to make a quick note of charging in the game. Most models have a Charge value after the Move value in their stats. The value is always higher than the normal Move, and models that have a Charge value can make a Charge action, moving in a straight line towards the declared target. If they end up within melee range, they can immediately make an attack as part of the Charge action. The Rotten Belles don’t have a charge stat so can’t charge, but Sybille has a charge of 6, so could have if she wasn’t partially behind the skull rock.
And that’s the end of TURN 3
TURN 4
At the start of the draw phase Ophelia draws her hand up to full, picking up a seven of tomes, twelve of masks, five of rams, and eleven of rams.
Seamus discards the five of crows and draws his hand up to full with a two of rams, twelve of crows, six of crows, twelve of tomes, and an ace of tomes.
Ophelia wins Initiative and she activates, using her Reckless ability, which does a wound to her in order to be Fast this activation (so she gets three actions instead of two). She casts Right Between the Eyes again on the Belle moving across the northern side of the board, but flips a black joker and so automatically fails. She casts it again and flips a ten for a total of 14, but Seamus flips an eleven to beat her with 15. She tries a third time and flips a six while Seamus flips a thirteen. Like I said, if I hadn’t screwed her out of the six Soulstones this would have gone a lot differently.
Seamus activates next and I notice on his card that he has the Fast ability all the time. Now it makes sense that his movement is only 4, as I had been thinking that he seemed slow for a character that was supposed to be so slippery. So this turn I make sure I use all 3 actions for him. Seamus uses his first two actions to move close enough to Francois so that he can charge him with his third action. He makes a melee attack with his Bag o’ Tools, and flips an eight for a total attack of 13. Ophelia flips a two and cheats it to an eleven of rams, bringing her total to 15. Seamus in turn cheats his flip to a twelve of crows. Seamus activates his Slit Jugular trigger with the crows suit, doing no damage with the attack, but forcing Ophelia to discard either two cards from her hand or two Soulstones to keep Francois from being killed outright. Ophelia discards the two cards and Francois survives with no damage taken. Having a rams suit for her defense flip allows Ophelia to trigger Francois’ Squeal effect, which allows him to make an immediate 4” move away from Seamus after the attack is resolved.
Rami activates next, and uses his Reckless ability, taking a wound to become Fast. He attempts to disengage from Sybille, allowing her to make a single attack against him as he leaves her melee range. Seamus flips a seven for Sybille’s attack and Ophelia flips a three. Ophelia cheats to a twelve giving Rami a defense of 16. Seamus also cheats a twelve to match her defense and hit Rami. Since he only matched the defense number, he receives a -2card to the damage flip and ends up only doing 2 wounds to Rami, but because he took wounds while attempting to disengage, his activation immediately ends – another bad break for Ophelia.
The Belle in the north activates and continues moving toward Ophelia’s deployment zone.
Francois activates and also takes a wound with Reckless to become Fast. He fires at Seamus, flipping a four while Seamus flips a thirteen which Ophelia has nothing in her hand to beat. He fires again, this time hitting and doing 2 damage. He fires a third time but Seamus flips a red joker and so the attack misses.
Sybille activates and swings her riding crop at Rami, hitting him and doing 2 damage, which is enough to kill him. Rami is removed, leaving a corpse counter behind, which Sybille uses her second action to pick up.
Seamus then activates the remaining two belles one after the other, moving them along the southern edge of the board toward Ophelia’s deployment zone.
And that was it for Turn 4.

TURN FIVE
Ophelia discards the four of rams and the five of tomes and picks up a nine of masks, ten of rams, twelve of crows, and a three of tomes.
Seamus discards the ace of tomes and the two of rams and picks up a three of crows, thirteen of crows, twelve of rams, and an ace of masks.
Ophelia wins initiative and activates first again. She takes a wound again for Reckless, moves as her first action, and then casts Right Between the Eyes on the Belle. She flips a twelve which beats Seamus initially, but Seamus cheats a twelve from his hand to match her and she has nothing higher than a twelve in her hand, so the spell fails once again. She tries casting it again with her third action and flips a four, cheating it to a five to beat Seamus’ total. Seamus cheats the flip to a thirteen, which Ophelia once again has nothing in her hand to beat, and the spell fails once more.
Seamus activates and charges Francois flipping an eight to hit him. Ophelia cheats to a 9 of masks, but Seamus cheats to a nine, matching her and hitting Francois. Even though he has to flip two extra cards for damage and take the lowest, he still manages a nine and does Moderate damage, doing three wounds to Francois. Seamus uses his second action to swing at Francois again, and hits him once more, flipping a twelve for damage to do 5 wounds, killing Francois. With his third action, Seamus picks up the corpse counter dropped by Francois.
Seamus activates the Belles and Sybille one after the other, moving them all toward Ophelia’s table edge.
And so ends turn five.

TURN SIX
Ophelia drops the three of tomes and fills her hand with an eleven of masks, a two of masks, and a thirteen of masks.
Seamus draws his hand up to full with a seven of rams, seven of crows, and a red joker which is pretty much the nail in the coffin for poor Ophelia.
Seamus decides to go for the kill here and cheats fate on the initiative duel with a nine, hoping to force Ophelia to burn a high card in order to activate first. After contemplating it for a moment, Ophelia decides to use a ten from her hand to cheat fate and win the initiative.
She activates first and takes another wound for reckless. She moves again with her first action, continuing to pursue the Rotten Belle moving into her deployment zone and attempt to stop Seamus from completing his Reconnoiter stratagem, and therefore giving herself 2 points for her Thwart scheme. For her second action she casts Right Between the Eyes again and this time she succeeds by cheating her flip to a thirteen. The spell does 1/2/5 and gains +3card to the damage flip. Since it is a spell, there is no modifier for how much or little she beat the resistance total by, though Seamus’ Hard to Wound(2) still kicks in reducing her bonus to a +1card. She flips an eleven and a six, so keeps the eleven to do Severe damage and 5 wounds to the Belle, leaving her with 3. For her final action, Ophelia casts Right Between the Eyes again, hoping to finish her off, but Seamus drops the hammer by cheating the red joker from his hand and the spell fails.
Seamus now activates and uses his first action to move into range of his Hand Cannon. He fires it, flipping a thirteen and hitting. Since he beats Ophelia’s defense number by enough to avoid flipping extra cards on the damage flip, he has the opportunity to cheat the flip, and he does so, cheating with a seven to do Moderate damage and 6 wounds. (he can only fire his hand cannon once per turn, but at 4/6/7 it sure packs a whallop) 6 wounds are enough to finish off Ophelia. Now Seamus realizes that by moving to kill Ophelia, he left himself unable to claim the northwest quarter of the table, doing Ophelia a big favor by killing her instead of making sure he completed his Strategem. If the game went another turn he could move into position, but he flips an eight to see if the game ends after the six turn, and the game is over (it only goes another turn on a ten or higher)

So now it’s time to add up victory points. Seamus fails to complete his Reconnoiter Strategem, but succeeds in his Breakthrough scheme with 3 models in Ophelia’s deployment to her zero. He also succeeds at the Army of the Dead scheme, since with all four of his undead minions surviving, plus the three corpse counters his crew has picked up, he has Ophelia 7-0 on that score. So he gets a total of 4 victory points for completing both Schemes.
Ophelia obviously failed at the Slaughter stratagem, having not eliminated a single enemy model. She also failed her Stake a Claim scheme by not controlling the skull temple at the end of the game. She does get two points for her Thwart scheme since she stopped Seamus from completing his stratagem.
So the final score is 4-2 and a win for Seamus and his Redchapel crew.
I enjoyed this scrimmage with myself and have a much better grasp of the rules now (especially after writing up this report) I’m really in love with the game system and the models, and am looking forward to being able to play it more.
 About a year ago I decided I was going to convert a Games-Workshop miniature into Trap Jaw from Masters of the Universe.
 So in early November of last year I dusted off my Trap Jaw conversion, and also converted Beastman out of kroot parts and an ungor head, and started building Faker out of a chaos marauder. I also floated the idea of the army and asked for some list on the Ordo-Ineptus board and asked for some list suggestions. I knew I wanted to do something with hellions because I had always loved the idea of them on their goblin gliders and was so happy when they got a plastic kit with their new codex last year. My friend Bob had been having some luck with his Baron Sathonyx themed lists he had been doing, so I was thinking of going a similar route but was still open to possibilities. At this point the plan was to knock out a couple custom figures a month and by summer I should have the force I wanted. At that point I would build a big Snake Mountain display base for the army and be ready to attend the next big 40K tournament near me!
 I had gotten most of the way through painting Beastman and Trap Jaw at this point, and was bouncing around different ideas for what army I wanted to go with, when I started thinking about what I would need to get the He-Man villains themed Dark Eldar army going. I figured I could probably do it with about 30 converted models, plus the 20 warriors and raider I already had from the box set, a couple more raiders, and some hellions. There were going to be 4 months of the escalation league, with each month being a different point value, starting at 500 and going to 1500 in March. I figured I could probably knock out about 8 models a month if I put the sculpting and converting process into overdrive, and have things all done for the 1500 pt games. I had been getting really excited about the project and figured ‘what the hell’!


